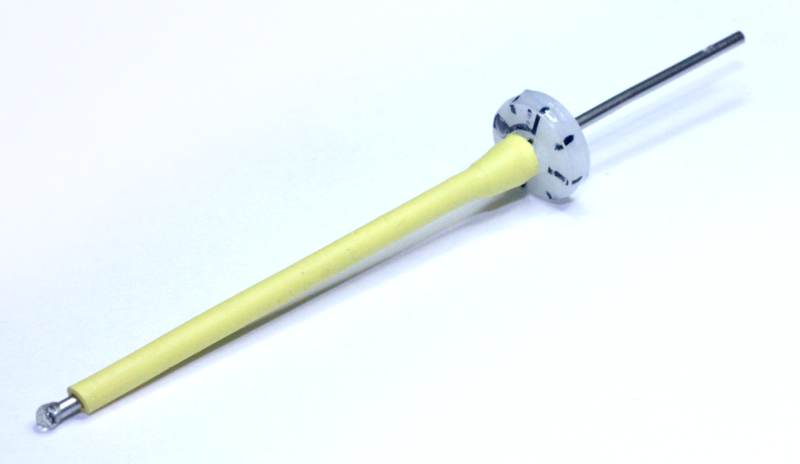
Custom electrode adjustment screwdriver
Adjusting electrodes is a slightly delicate process, having the right tool for the job makes it much easier.
There are two issues with the process:
- Good depth tracking requires very precise adjustment, so that as errors accumulate, they don't become significant.
- Electrodes and springs should not be touched.
This custom screwdriver for half-circle/ half-moon screw heads makes adjustments much easier by breaking the step of getting the screwdriver onto the screw head into two steps:
- Roughly engage screw driver with screw head, correct rotation doesnt matter in this step.
- Gently rotate the screwdriver until it engages with the screw head and is locked into the same angle as the screw. It will slip a bit (~1mm) further onto the screw when it engages.
- Now you can apply more torque to rotate the screw.
To make the screwdriver for the 1mm OD half-moon heads used on the custom screws in the flexDrive, you'll need;
- A piece of mm ID steel cannula
- Tool for cutting cannula, a Dremel cutoff-wheel or similar
- Half-moon head screw from flexDrive
- Solder
- Stainless steel flux
- Razor blade or sandpaper
- Shrink tubing or tape
- Some thin plastic or paper
- Epoxy
Assembly instructions:
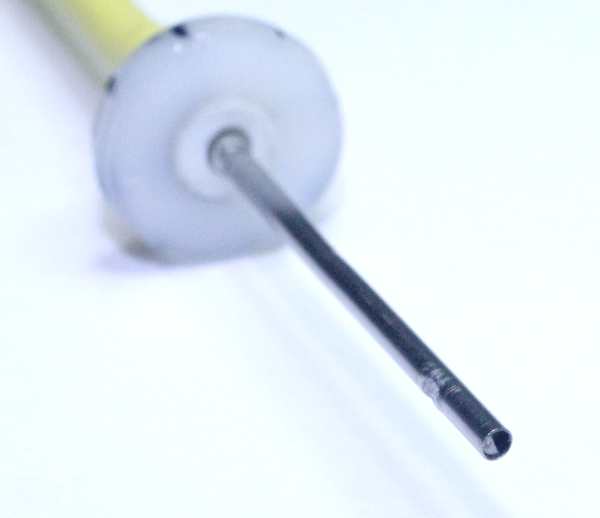
- Get a piece of 1mm ID steel cannula, cut a piece to the length of the screwdriver that seems comfortable for you to use.
- make sure on end of the cannula is cut cleanly and has no sharp edges or burrs. Polish if necessary.
- The aim is to solder a screw into one end, so that it's head can engage the head of the screws on the drive. For this, cut a small opening into the side of the cannula, near one end. When you insert a screw into the cannula, you should see the threads through this hole.
- Clamp the cannula horizontally so you can see the opening you just cut.
- Insert the screw into the cannula, so that the head sits almost flush with the end, but is recessed by about 0.1-0.3 mm. This will make a ridge that will hold on to the screws even if the rotation of the screwdriver is 'wrong' and doesnt engage the screw head. This way it's much harder to accidentally slip and damage the drive.
- add a tiny drop of stainless steel solder to the hole on the side. If the flux flows to the opening of the cannula where the screw head sits, you added too much - remove the screw, clean everything and repeat. Too much flux will make solder flow to the head and ruin the screwdriver.
- Add heated solder to the hole at the side..A lot of solder will wick into the cannula, so keep adding enough to make good contact with the screw, but not so much that it flows out the front.
- remove any solder sticking out from the opening with a razor blade or fine sandpaper.
- Now make a circular piece of plastic or cardboard with regular markings indicating the angular increments you want to adjust electrodes in. We typically use 1/4 and 1/8 turns.
- Paint one half of the indicator a darker color to indicate the recessed side of the half-circle screw that you're adjusting. This way you can just look at the screw and rotate the screwdriver so it fits right away.
- Glue the indicator to the screwdriver in the correct orientation relative to the screw head. Either glue it on the end, or as shown here, about halfway along the handle. This way you can align one mark with the handle of the screwdriver, and rotate very precisely until the next mark aligns, all without loosing focus of the drive and screw. If you're using a marker to draw the indicator marks as shown here, cover the marks in epoxy so they won't rub off.
- Shrinkwrap the handle or use tape to make it a bit thicker and easier to grip.
- Add a drop of epoxy to the end so you don't stab yourself when using it.