NOTE: If your board already has an FPGA, you can skip this step.
If your acquisition board did not come with an FPGA, or if you built it yourself, you'll have to buy and install your own. We recommend using the XEM6310-LX45 ($499.95), which transmits data via USB 3.0, and supports up to 512 channels of simultaneous data acquisition. The board is also compatible with the Opal Kelly 6010-LX45 FPGA module ($399.95), which uses USB 2.0 and can handle up to 128 channels.
Required components: Opal Kelly FPGA, heat sink (25 x 25 x 9.5 mm, such as this one from DigiKey)
Tools: M3 hex key or Phillips screwdriver, depending on your specific board
1. Flip the acquisition board over and use the hex key to remove the four screws. Some squeaking is to be expected.
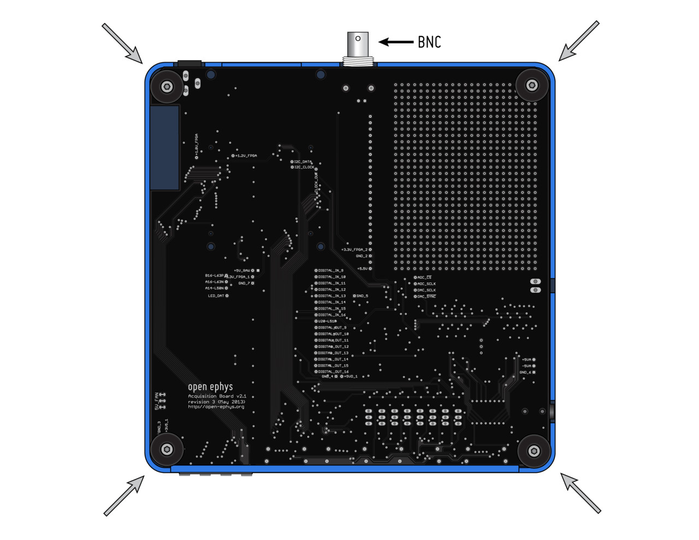
2. Carefully remove the circuit board from the case by lifting the BNC and sliding it out.
3. Flip the circuit board face-up and place it on a flat surface.
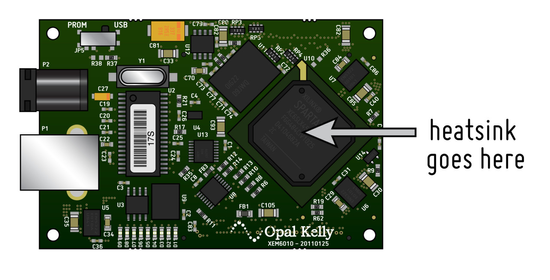
4. Remove the backing from the heatsink and press it onto the main chip of the FPGA.
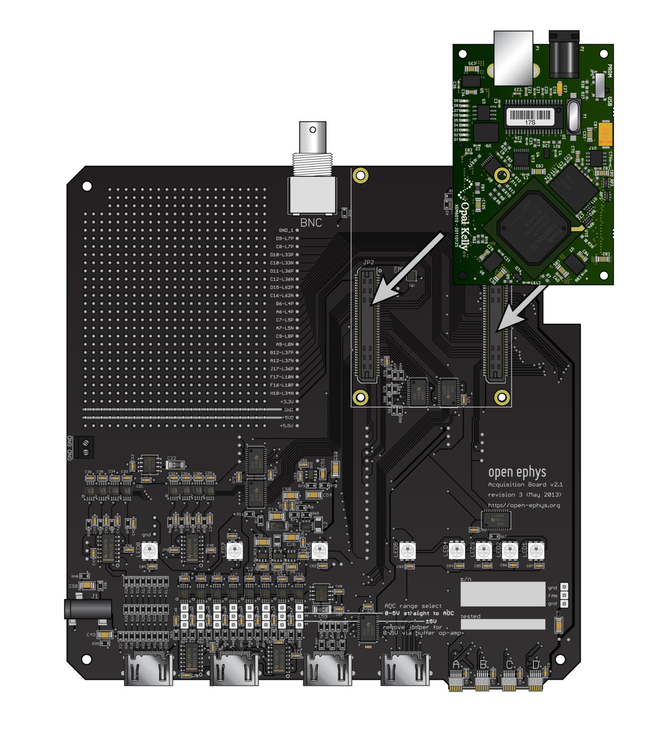
5. Align the connectors on the bottom of the FPGA with the connectors on the circuit board, and press the FPGA firmly into place.
5b. (optional) insert a 3x3x1cm fan into the opening in the case, and connect the fan power cable to the 3-pin fan connector on the acquisition board (polarity doesn't matter). Fold the cable up so it doesnt loop around the case too much. If the fan is scratching the side of the case, just rotate it 180 degrees, the air flow should be sufficient in either direction.
6. Place the circuit board back into the case, and replace the four screws. To insert the board, first carefully slide the four small headstage connectors through their opening in the case, hold the board at an angle for this step. The HDMI connectors should now easily fit into their openings. Dont force the board in at this stage, if there's too much resistance, the alignment is likely wrong and you risk bending the pins on the omnetics connectors. Once the front edge is in the housing, just push the board in using the front as a hinge. The Opal Kelly board should easily fit into the four guide posts in the case now.