Construct the sighting pin
- HT B
Owned by HT B
Last updated: Nov 13, 2015
Before you begin
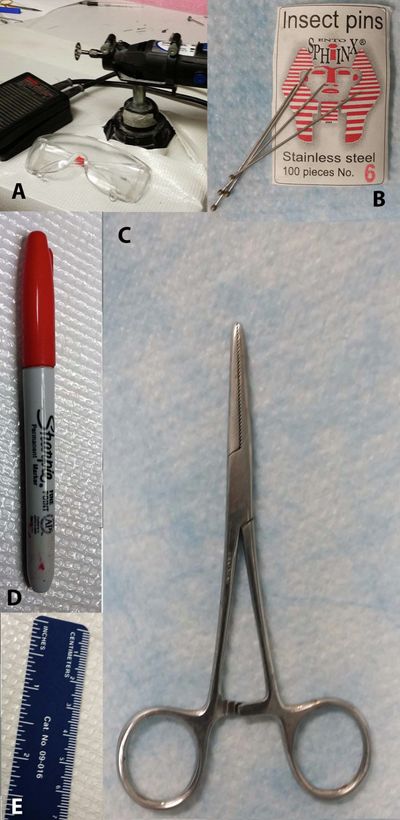
Equipment needed for this job:
- Table-mounted DremelTM or equivalent motorized rotary tool with diamond cutting wheel (Fig. 0A)
- Hemostat forceps (Fig. 0C)
Supplies needed for this job:
- Sphinx brand #6 insect pins (Fig 0B)
- SharpieTM or similar permanent marker (Fig 0D)
- Metric ruler (Fig 0E)
Figure 0. Equipment and Supplies
Procedures
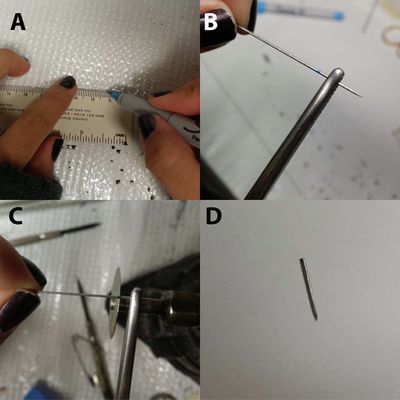
- Mark length (Fig 1A). Use a ruler and a permanent marker to mark a #6 insect 11.0 mm from its sharp tip.
- Grasp the pin with the forceps (Fig 1B), Very gently clamp the pin with the forceps, taking care not to bend the pin. You should clamp it about halfway between the tip and the mark you made.
- Cut off the tip of the pin (Fig 1C). Use the cutting wheel to cut off the tip of the pin at the length of 11.0 mm you marked off. DO NOT BEND THE PIN. It will need to be straight for accurate surgical placement of your probes.
- Unclamp and store the sighting pin (Fig 1D). The sighting pin can be set aside in a safe place until later. It will be needed when the targeting cone is assembled.
Figure 1. Cutting the sighting pin
, multiple selections available, Use left or right arrow keys to navigate selected items